


Making a patchwork quilt with a snowflake pattern is a delightful and rewarding endeavor that combines creativity, craftsmanship, and a touch of winter magic. As a patchwork quilts supplier, I've had the pleasure of working with various fabrics and patterns, and the snowflake pattern is one that never fails to capture the essence of the holiday season. In this blog post, I'll guide you through the process of creating your own snowflake patchwork quilt, from selecting the right materials to the final stitching.
Selecting the Right Fabrics
The first step in making a snowflake patchwork quilt is choosing the right fabrics. You'll need a variety of fabrics in different colors and patterns to create the snowflake design. For the snowflake itself, you might want to use white or light blue fabrics to mimic the look of snow. For the background, you can choose a darker color to make the snowflakes stand out.
When selecting fabrics, consider the quality and texture. Quilting cotton is a popular choice because it's easy to work with and holds up well over time. You can also choose fabrics with different prints, such as solids, stripes, or floral patterns, to add visual interest to your quilt.
As a patchwork quilts supplier, we offer a wide range of fabrics suitable for making snowflake patchwork quilts. You can check out our Patchwork Printed Quilt Set for inspiration and to find high-quality fabrics that match your color scheme.
Designing the Snowflake Pattern
Once you've selected your fabrics, it's time to design the snowflake pattern. There are many different ways to create a snowflake pattern, but one of the most common methods is to use paper templates. You can find free snowflake templates online or create your own using a piece of paper and a pair of scissors.
To create a snowflake template, start by folding a square piece of paper in half diagonally to form a triangle. Then, fold the triangle in half again to form a smaller triangle. Next, fold the triangle in half one more time to form an even smaller triangle. Finally, cut out a snowflake shape from the folded paper, making sure to leave the folded edge intact.
Once you have your snowflake template, you can use it to trace the snowflake shape onto your fabric. Use a fabric marker or a piece of chalk to trace the shape, making sure to leave a small seam allowance around the edges.
Cutting the Fabric
After you've traced the snowflake shape onto your fabric, it's time to cut it out. Use a pair of sharp fabric scissors to cut along the traced line, making sure to cut as accurately as possible. You can also use a rotary cutter and a cutting mat for a more precise cut.
Once you've cut out all the snowflake shapes, you can start cutting the background fabric. You'll need to cut the background fabric into squares or rectangles that are slightly larger than the snowflake shapes. This will allow you to sew the snowflakes onto the background fabric with a small seam allowance.
Sewing the Snowflakes Together
Now that you've cut out all the fabric pieces, it's time to start sewing the snowflakes together. You can use a sewing machine or sew by hand, depending on your preference and skill level.
To sew the snowflakes together, place two snowflake shapes right sides together and pin them in place. Then, use a straight stitch to sew along the edges of the snowflake, leaving a small opening at the bottom for turning. Make sure to backstitch at the beginning and end of the seam to secure the stitches.
Once you've sewn the snowflakes together, turn them right side out through the opening at the bottom. Use a chopstick or a turning tool to push the corners out and make the snowflakes look nice and round. Then, use a ladder stitch to close the opening at the bottom of the snowflake.
Sewing the Snowflakes onto the Background Fabric
After you've sewn all the snowflakes together, it's time to sew them onto the background fabric. To do this, place the snowflakes on the background fabric in the desired arrangement and pin them in place. Then, use a straight stitch to sew around the edges of the snowflakes, making sure to sew through all the layers of fabric.
You can sew the snowflakes onto the background fabric in a variety of ways, such as in a grid pattern, a random pattern, or a circular pattern. Experiment with different arrangements to find the one that looks best for your quilt.
Adding the Border
Once you've sewn all the snowflakes onto the background fabric, it's time to add the border. You can use a single color of fabric for the border or choose a fabric with a coordinating print.
To add the border, cut the border fabric into strips that are the desired width and length. Then, sew the border strips onto the edges of the quilt, making sure to match the seams and corners. You can use a straight stitch or a decorative stitch to sew the border onto the quilt.
Quilting the Quilt
After you've added the border, it's time to quilt the quilt. Quilting is the process of stitching the layers of the quilt together to hold them in place and add texture and dimension to the quilt.

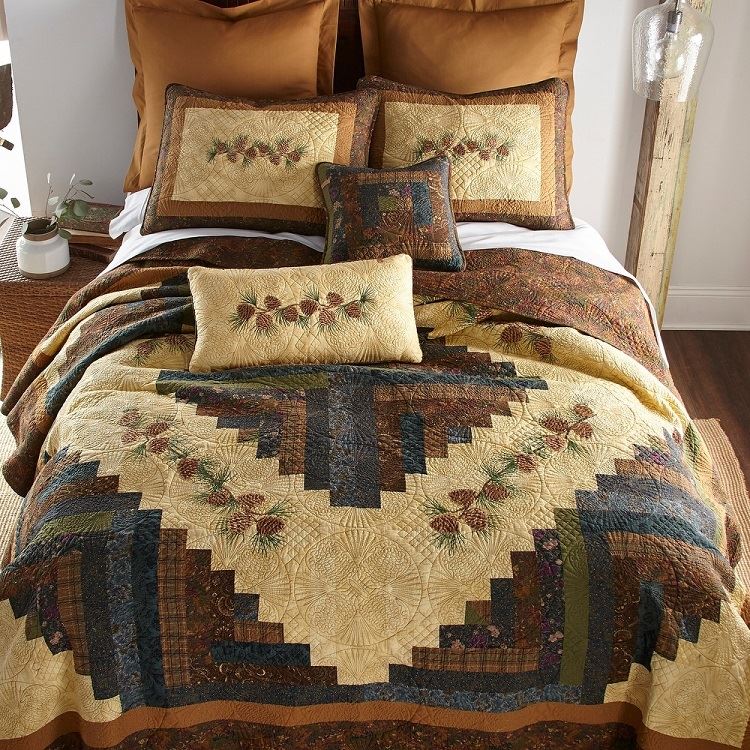
You can quilt the quilt by hand or using a sewing machine. If you're quilting by hand, you'll need to use a quilting needle and thread to stitch through all the layers of the quilt. If you're using a sewing machine, you can use a free-motion quilting foot or a walking foot to stitch the quilt.
When quilting the quilt, you can use a variety of stitches and patterns, such as straight lines, curves, or loops. Experiment with different stitches and patterns to find the one that looks best for your quilt.
Binding the Quilt
Once you've quilted the quilt, it's time to bind the edges. Binding is the process of finishing the edges of the quilt to prevent them from fraying and to give the quilt a professional look.
To bind the quilt, cut the binding fabric into strips that are the desired width and length. Then, fold the binding strips in half lengthwise and press them with an iron. Next, sew the binding strips onto the edges of the quilt, starting at one corner and working your way around the quilt. Make sure to miter the corners of the binding to give the quilt a nice, finished look.
Finishing the Quilt
After you've bound the quilt, it's time to finish it off. You can add a label to the back of the quilt with your name, the date, and a description of the quilt. You can also wash and dry the quilt to make it look nice and soft.
And that's it! You've now created your own snowflake patchwork quilt. It's a beautiful and unique piece of art that you can cherish for years to come.
Conclusion
Making a patchwork quilt with a snowflake pattern is a fun and rewarding project that allows you to express your creativity and showcase your sewing skills. By following the steps outlined in this blog post, you can create your own snowflake patchwork quilt that is both beautiful and functional.
As a patchwork quilts supplier, we offer a wide range of fabrics, patterns, and supplies to help you create your own patchwork quilts. Whether you're a beginner or an experienced quilter, we have everything you need to make your next quilt project a success.
If you're interested in purchasing fabrics or supplies for your snowflake patchwork quilt, or if you have any questions or comments, please don't hesitate to contact us. We'd love to hear from you and help you with your quilting needs.
References
- "The Complete Guide to Patchwork Quilting" by Mary Jane Temple
- "Quilting for Beginners" by Jennifer Chiaverini
- "Snowflake Quilt Patterns" by Annie's Attic