


Hey there! As a supplier of embroidered quilts, I'm super excited to take you through the process of dyeing the fabric for these beautiful creations. It's a journey filled with colors, science, and a whole lot of creativity. So, let's dive right in!
Step 1: Choosing the Right Fabric
The first step in dyeing fabric for an embroidered quilt is selecting the perfect base material. We usually go for high - quality cotton because it's breathable, durable, and takes dyes really well. Cotton has these little fibers that can soak up the dye like a sponge, which means we get rich, long - lasting colors.
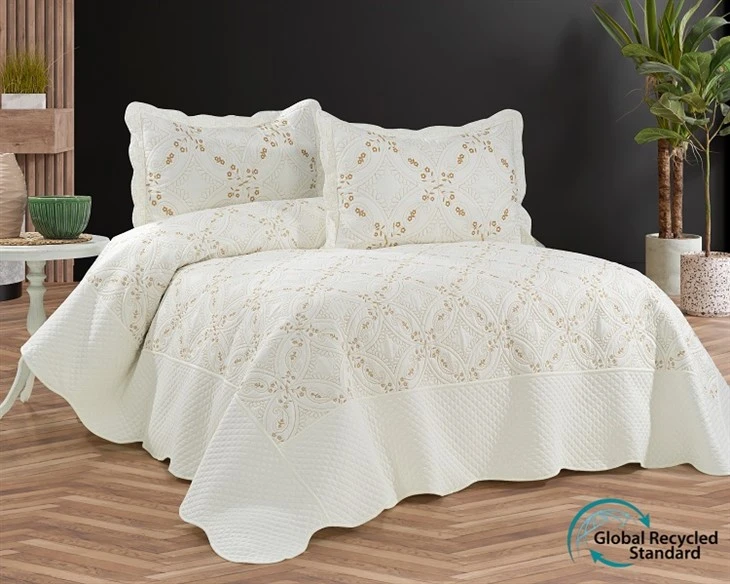
There are different types of cotton, too. For example, the fabric for our Embroidered Striped Cotton Quilt Set is a special blend that gives it a soft feel and a nice drape. And for our Embroidered Quilt Set With GRS Certification, we use organic cotton, which is not only better for the environment but also has a natural texture that looks amazing when dyed.

Step 2: Pre - treatment
Once we've got our fabric, it's time for pre - treatment. This is like getting the fabric ready for a big party. We need to clean it thoroughly to remove any dirt, oils, or sizing that might be on the surface. If we don't do this, the dye won't stick properly, and we'll end up with patchy colors.
We usually soak the fabric in a warm, soapy solution. This helps to break down any impurities. After that, we rinse it really well until the water runs clear. Then, we might give it a little soak in a chemical pre - treatment solution. This can help to open up the fabric fibers, making it easier for the dye to penetrate.
Step 3: Selecting the Dyes
Now, this is where the fun really begins! There are so many different types of dyes out there, and each one has its own unique properties. We use a combination of natural and synthetic dyes, depending on the look we're going for.
Natural dyes are made from plants, fruits, and other natural sources. They give a more earthy, organic look to the fabric. For example, we can use indigo plants to get a beautiful blue color, or madder roots for a warm red. These dyes are great because they're eco - friendly, but they can be a bit more challenging to work with because the color can vary depending on the source and the way they're processed.
Synthetic dyes, on the other hand, are more consistent in color. They come in a huge range of shades, from bright neons to soft pastels. We use them when we need a very specific color for a design. For our Cotton Waffle Quilt, we might use synthetic dyes to get that perfect, uniform color that really makes the waffle texture stand out.
Step 4: Mixing the Dye Bath
Once we've chosen our dyes, it's time to mix the dye bath. This is basically a big pot of water with the dye dissolved in it. The amount of dye we use depends on how dark or light we want the color to be.
We also need to add some chemicals to the dye bath to help the dye bond with the fabric. This could be things like salt or vinegar. Salt helps to make the dye stick better to the fabric, while vinegar can help to set the color and make it more vibrant.
We heat the dye bath slowly, stirring it constantly to make sure the dye is evenly distributed. The temperature is really important here. Different dyes work best at different temperatures, so we have to keep a close eye on the thermometer.
Step 5: Dyeing the Fabric
Now it's time to actually dye the fabric. We carefully lower the pre - treated fabric into the dye bath, making sure it's completely submerged. We use a long stick to stir the fabric around in the dye bath, making sure every part of it gets a chance to soak up the color.
The longer the fabric stays in the dye bath, the darker the color will be. We keep a close eye on the color as it develops, and when it reaches the shade we want, we carefully lift the fabric out of the dye bath.
Step 6: Rinsing and Fixing the Color
After the fabric is dyed, we need to rinse it to remove any excess dye. We start by rinsing it in cold water, then gradually move to warmer water. This helps to prevent the color from bleeding.
Once the water runs clear, we move on to the fixing process. This is where we use a special fixing agent to make sure the color stays in the fabric. We soak the fabric in a solution with the fixing agent for a certain amount of time, then rinse it again.
Step 7: Drying and Finishing
Finally, it's time to dry the fabric. We usually hang it up to dry in a well - ventilated area. This helps to prevent any wrinkles from forming.
After the fabric is dry, we might give it a little ironing to smooth it out. And that's it! The fabric is now ready to be used for our embroidered quilts.
Conclusion
Dyeing the fabric for an embroidered quilt is a complex but incredibly rewarding process. It's a combination of science, art, and a whole lot of patience. Each step is crucial in creating the beautiful, vibrant colors that make our quilts so special.
If you're interested in our embroidered quilts or want to discuss a custom order, we'd love to hear from you. Whether you're a retailer looking to stock our products or an individual looking for a unique quilt for your home, we're here to help. Just reach out, and let's start a conversation about bringing these beautiful, hand - dyed and embroidered quilts into your life.
References
- "Textile Dyeing and Finishing" by Lewis, D. M.
- "Natural Dyes: Methods of Extraction, Application and Evaluation" by Muthukumar, M., & Sivakumar, P.