


Making a patchwork quilt square is a delightful and creative process that allows you to express your artistic flair while crafting a beautiful and functional piece. As a patchwork quilts supplier, I've had the pleasure of witnessing the joy and satisfaction that comes from creating these unique squares. In this blog post, I'll guide you through the step-by-step process of making a patchwork quilt square, sharing tips and techniques along the way.
Step 1: Gather Your Materials
Before you begin, you'll need to gather the necessary materials. Here's a list of what you'll need:
- Fabric: Choose a variety of fabrics in different colors, patterns, and textures. You can use cotton, linen, silk, or any other fabric that you like. Aim for at least 4-6 different fabrics to create an interesting and diverse patchwork.
- Thread: Select a thread that matches the color of your fabrics. You can use cotton, polyester, or a blend of both.
- Scissors: Invest in a good pair of fabric scissors to ensure clean and precise cuts.
- Rotary cutter and cutting mat: A rotary cutter and cutting mat make it easier to cut fabric accurately and quickly.
- Pins: Use straight pins to hold the fabric pieces together while you sew.
- Sewing machine: A sewing machine is essential for sewing the fabric pieces together. Make sure your sewing machine is in good working condition and threaded with the appropriate thread.
- Iron and ironing board: An iron and ironing board are used to press the fabric pieces and seams to ensure a flat and professional finish.
Step 2: Plan Your Design
Once you have your materials, it's time to plan your design. You can choose from a variety of patchwork quilt square designs, such as the nine-patch, log cabin, or flying geese. You can find inspiration for your design in books, magazines, online tutorials, or by creating your own unique pattern.
To plan your design, start by sketching out your idea on paper. You can use graph paper to help you create a grid and visualize the placement of your fabric pieces. Once you have a rough sketch, you can start selecting the fabrics that you want to use for each section of the square.
Step 3: Cut Your Fabric
After you have planned your design, it's time to cut your fabric. Use your rotary cutter and cutting mat to cut the fabric pieces to the appropriate size and shape. Make sure to cut the fabric pieces accurately and precisely to ensure that they fit together properly.
When cutting your fabric, it's important to leave a seam allowance of at least 1/4 inch around each piece. This will allow you to sew the fabric pieces together and create a finished edge.
Step 4: Sew the Fabric Pieces Together
Once you have cut your fabric pieces, it's time to sew them together. Start by pinning the fabric pieces together in the order that you want them to be sewn. Make sure to align the edges of the fabric pieces carefully and use straight pins to hold them in place.
To sew the fabric pieces together, use your sewing machine to stitch along the edges of the fabric pieces, using a 1/4 inch seam allowance. Make sure to backstitch at the beginning and end of each seam to secure the stitches.
After you have sewn the fabric pieces together, press the seams open using an iron and ironing board. This will help to flatten the seams and create a smooth and professional finish.
Step 5: Assemble the Quilt Square
Once you have sewn the fabric pieces together, it's time to assemble the quilt square. Start by arranging the sewn fabric pieces on a flat surface in the order that you want them to be assembled. Make sure to align the edges of the fabric pieces carefully and use straight pins to hold them in place.

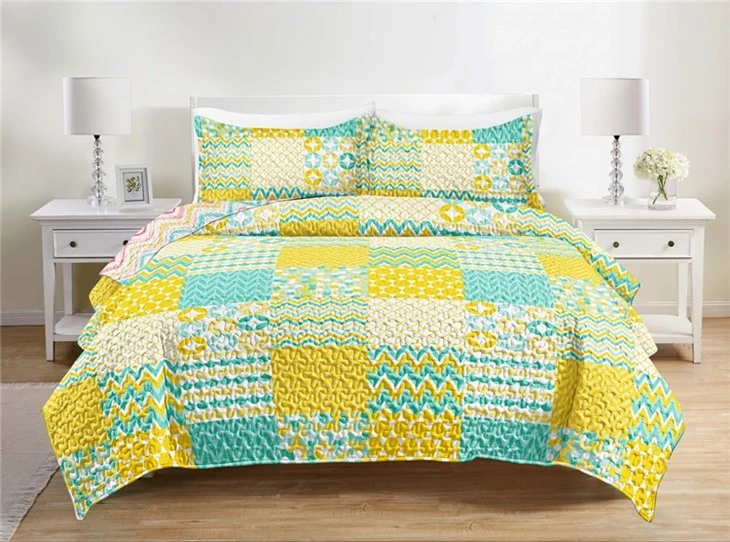
To assemble the quilt square, use your sewing machine to stitch along the edges of the fabric pieces, using a 1/4 inch seam allowance. Make sure to backstitch at the beginning and end of each seam to secure the stitches.
After you have sewn the fabric pieces together, press the seams open using an iron and ironing board. This will help to flatten the seams and create a smooth and professional finish.
Step 6: Finish the Quilt Square
Once you have assembled the quilt square, it's time to finish it. You can finish the quilt square by adding a border, binding, or backing. A border adds a decorative edge to the quilt square, while a binding finishes the raw edges of the quilt square and gives it a professional look. A backing is used to cover the back of the quilt square and provide additional warmth and durability.
To add a border, cut a strip of fabric that is the desired width and length to fit around the perimeter of the quilt square. Pin the border strip to the edge of the quilt square, making sure to align the edges carefully. Sew the border strip to the quilt square using a 1/4 inch seam allowance, and press the seam open.
To add a binding, cut a strip of fabric that is the desired width and length to fit around the perimeter of the quilt square. Fold the binding strip in half lengthwise, wrong sides together, and press. Pin the binding strip to the edge of the quilt square, making sure to align the raw edges of the binding strip with the raw edges of the quilt square. Sew the binding strip to the quilt square using a 1/4 inch seam allowance, and press the seam open.
To add a backing, cut a piece of fabric that is the desired size and shape to fit the back of the quilt square. Place the backing fabric on a flat surface, wrong side up. Place the quilt square on top of the backing fabric, right side up. Pin the quilt square and backing fabric together, making sure to align the edges carefully. Sew the quilt square and backing fabric together using a 1/4 inch seam allowance, leaving a small opening in one side of the seam for turning.
Turn the quilt square right side out through the opening in the seam. Use a chopstick or a similar tool to push the corners out and shape the quilt square. Pin the opening in the seam closed and sew it shut using a 1/4 inch seam allowance.
Step 7: Press and Finish the Quilt Square
After you have added the border, binding, and backing, it's time to press and finish the quilt square. Use an iron and ironing board to press the quilt square to ensure a flat and professional finish. Make sure to press the seams open and flatten the edges of the quilt square.
Once you have pressed the quilt square, you can add any additional embellishments or details, such as embroidery, appliqué, or beading. These embellishments can add a personal touch to your quilt square and make it unique.
Conclusion
Making a patchwork quilt square is a fun and rewarding process that allows you to express your creativity and create a beautiful and functional piece of art. By following these steps and using the right materials and tools, you can create a patchwork quilt square that is both beautiful and durable.
If you're interested in purchasing high-quality patchwork quilts or quilt sets, I invite you to visit our website. We offer a wide selection of Floral Patchwork Quilt Set, Colorful Patchwork Quilt Set, and Blue Patchwork Quilt that are made from the finest fabrics and materials. Our patchwork quilts are available in a variety of sizes, colors, and patterns to suit your individual style and needs.
If you have any questions or would like to discuss your specific requirements, please don't hesitate to contact us. We're here to help you find the perfect patchwork quilt for your home.
References
- "The Complete Book of Patchwork and Quilting" by Jinny Beyer
- "Quilting for Beginners" by Melinda Bula
- "Online Quilting Tutorials" by Craftsy